Processing the sale via Cash:
Step 1: After clicking the 'Checkout' button at the bottom of the Shopping Cart, the 'Payment' screen will appear
Step 2: In the 'Select Payment' section, click the 'Cash' tab as your payment type
Step 3: Next, in the 'Amount' section, enter in the amount of cash received from the guest for the transaction. A message with the "Change Owed" to the customer will be displayed as part of the screen and will change based on the amount of cash received.
Step 4: Click the 'Register' button in the bottom of the Shopping Cart to complete the transaction
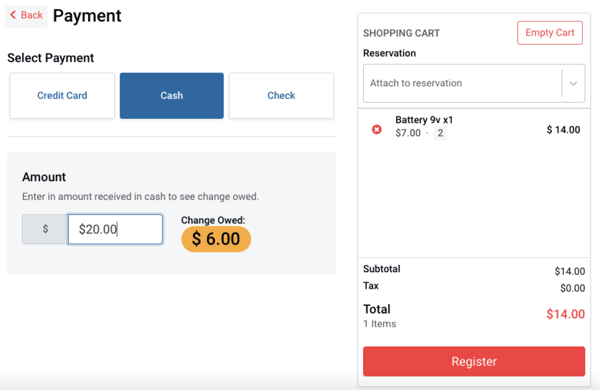 Please note: You will not be able to register the sale until the amount received is enough to cover for the purchase.
Step 5: Your transaction is now complete, select the receipt option your guest prefers on the 'Successful Payment' screen
Processing the sale via Credit Card:
Step 1: After clicking the 'Checkout' button at the bottom of the Shopping Cart, the 'Payment' screen will appear
Step 2: In the 'Select Payment' section, click the 'Credit Card' tab as your payment type
Step 3: Enter in the required credit card information fields provided by your guest:
- Cardholder full name
- Credit card number
- Credit card expiration month and year
- Credit card CVC
- Billing street address, city, and zip code
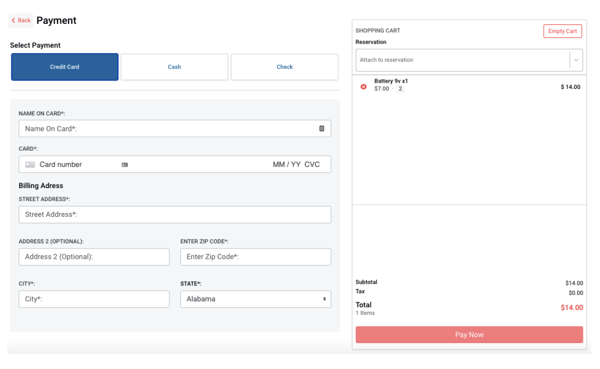 Step 4: Click the 'Pay Now' button in the bottom of the Shopping Cart to complete the transaction
Step 5: Your transaction is now complete, select the receipt option your guest prefers on the 'Successful Payment' screen
Processing the sale via Check:
Step 1: After clicking the 'Checkout' button at the bottom of the Shopping Cart, the 'Payment' screen will appear
Step 2: In the 'Select Payment' section, click the 'Check' tab as your payment type
Step 3: In the "Check Information" section, enter in the 'Check Number' and optional message in the 'Memo' field for your records. (This screen will also show the date and payee information for the guest to write the check correctly).
Step 4: Click the 'Register' button in the bottom of the Shopping Cart to complete the transaction
Step 5: Your transaction is now complete, select the receipt option your guest prefers on the 'Successful Payment' screen
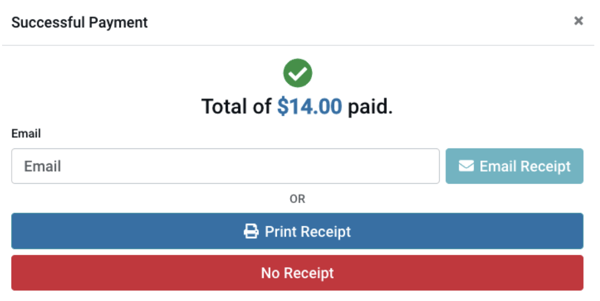
Finishing the transaction with a receipt:
Once the transaction is processed, a "Successful Payment" screen will appear and show the following:
- Total of the transaction
- Receipt Options:
- Email - Enter in the guest's email address if they prefer their receipt via email and click the light blue 'Email Receipt' button
- Print - Click the dark blue 'Print Receipt' button if your guest prefers a printed receipt
- No Receipt - Click the red 'No Receipt' option if your guest would not like to receive a receipt